How To Braid Your Hair: Simple Steps For A Stylish Look
There’s nothing more stylish and chic than a perfectly pleated braid, so it's almost a wonder more people don't try them. A nice braid, you see, does more than just keep your hair out of your face. It also adds a fun "twist" to your everyday look, making your style feel fresh and new, which is pretty cool.
This article offers an easy to follow tutorial for braiding hair, along with learning how to french braid and dutch braid, too. In this guide, you will learn how to braid your own hair for the first time, which is a big step for many. We will go over the basics of braiding and put in some practice together, helping you feel more confident with your hands.
Pull up to your mirror and let's get to it, you know, because practice makes things easier. Mastering the basics of braiding can empower you to create stunning looks that showcase your creativity and personal style, which is actually quite rewarding. Braids are an expansive world, with countless types and techniques to try, so you'll always have something new to learn.
Table of Contents
- Introduction to Braiding
- Why Braiding Your Hair Is a Good Idea
- Getting Started: The Very Basics of Braiding
- Learning the French Braid
- Learning the Dutch Braid
- Helpful Braiding Advice for Different Hair Types
- Frequently Asked Questions About Braiding
Introduction to Braiding
Braiding, in some respects, is a simple weaving technique used for everything from hair to ribbon to flowers, so it's a skill with many uses. When it comes to hair, braiding your hair can be a huge timesaver while also creating a hairdo you can flaunt!, which is pretty great. This guide gives you the chance to pick up a useful skill, something you can use every day, or just for special times.
Why Braiding Your Hair Is a Good Idea
A good braid, you see, keeps your hair out of your face, which is very practical for everyday life. It also adds a fun "twist" to your look, making your style a bit more interesting without much fuss. This can really change how you feel about your hair, giving it a fresh feel, which is kind of nice.
Braids are a great way to protect your hair from daily wear and tear, too. They can reduce tangles and keep your hair neat for longer periods, meaning less styling time later. This is especially true for those with longer hair, as it helps keep strands together and tidy, like your hair is having a good day.
- Aldi Cheese Recalls
- Brigitte Nielsen Spouse
- Left Eye Death
- Greatest Showman Broadway
- Dana Perino Husband
Plus, a braided style can last for days, which is a major benefit for busy people. You can wake up, and your hair is already looking good, saving you time in the morning, honestly. This simple fact alone makes braiding a worthwhile skill to pick up, providing both style and convenience, you know.
Getting Started: The Very Basics of Braiding
Before you begin any braid, a little preparation goes a long way, you know. Make sure your hair is tangle-free and smooth, which makes the braiding process much easier. You might want to use a comb or brush to get rid of any knots, just like you would before styling it any other way.
Hair Preparation Tips
Having hair that is slightly damp, or has a bit of product in it, can make it easier to hold the strands, in a way. A light mist of water or a tiny bit of styling cream can add grip, which helps prevent pieces from slipping out. This is especially useful if your hair is very fine or super silky, making it a bit more cooperative.
Make sure you have all your tools ready, like hair ties or clips, before you start. Having everything within reach means you won't have to stop mid-braid, which can be annoying. A good mirror, too, is a big help, especially when you are braiding the back of your head, obviously.
The Classic Three-Strand Braid
This is where everyone starts, the simple three-strand braid, you know. It's the foundation for almost every other braid style, so getting this down is important. It’s a pretty basic weaving technique, but it needs a little practice to make it look neat and even, which is fair enough.
Divide Your Hair: Take a section of hair where you want your braid to start. Separate this section into three equal parts. It helps to keep them distinct, so you don't mix them up, basically.
Cross the Right Strand: Take the rightmost strand and cross it over the middle strand. The strand that was originally on the right is now in the middle position, which is the first move. The strand that was in the middle is now on the right, you see.
Cross the Left Strand: Now, take the leftmost strand and cross it over the new middle strand. The strand that was on the left is now in the middle, and the one that was in the middle moves to the left, like your hands are dancing.
Repeat: Keep repeating these two steps, alternating between crossing the right strand over the middle and the left strand over the middle. Maintain a consistent tension as you go, which helps the braid look even, you know.
Secure the End: Once you reach the end of your hair, or where you want the braid to stop, secure it with a hair tie. You can use a clear elastic for a more subtle finish, or a colorful one to add some flair, just like you like your style.
Practice this simple braid a few times, and you'll find your rhythm, which is really what it's about. It might feel a bit awkward at first, especially when you are doing it on your own head, but it gets easier with each try, honestly. This basic skill is your ticket to more complex styles, pretty much.
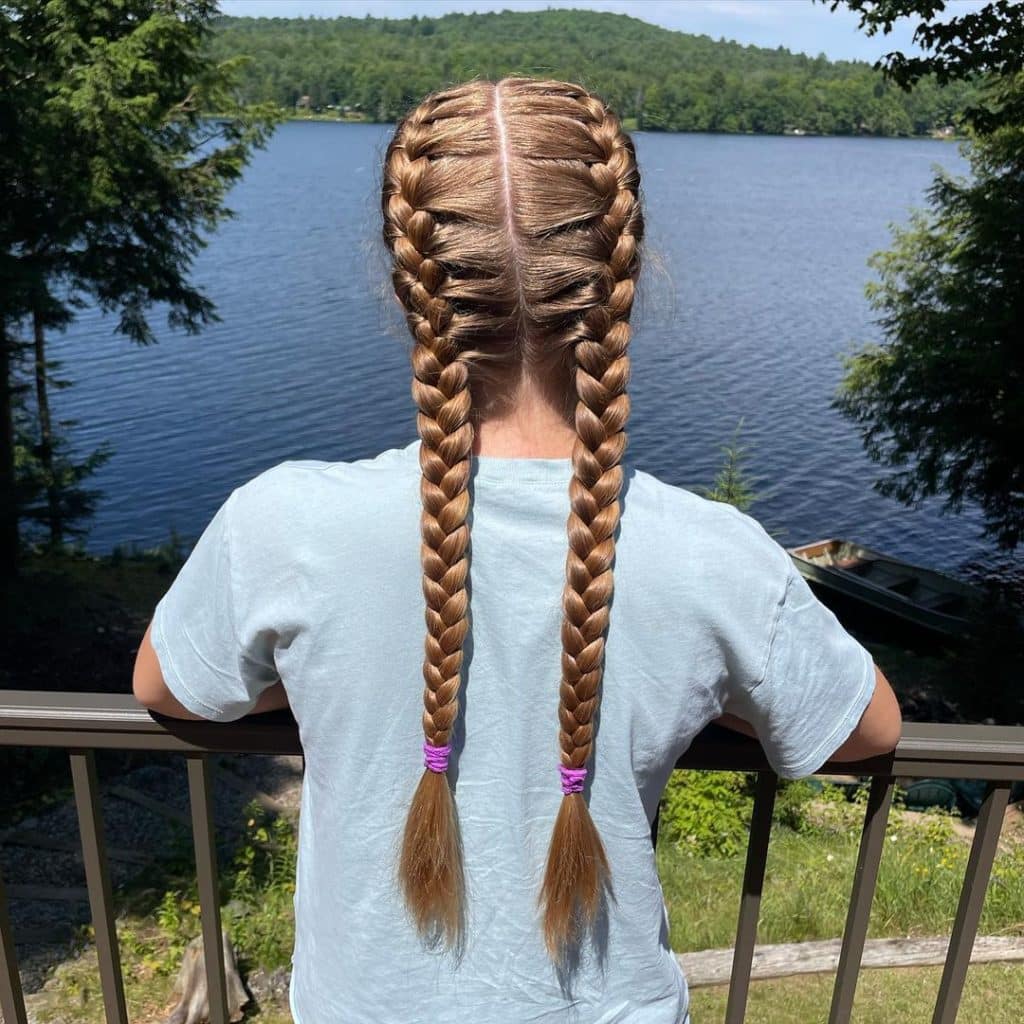
Learning the French Braid
The French braid looks a bit more complex than the basic three-strand, but it builds directly on that skill, you know. The main difference is that you add small sections of hair to your working strands as you go along, which creates a braid that sits close to the scalp. It's a classic look, very elegant, and pretty versatile.
Step-by-Step French Braid
Start with a Section: Begin by taking a section of hair from the top of your head, near your forehead. This section should be about two to three inches wide, depending on how thick you want the top of your braid to be, more or less.
Divide and Start Braiding: Split this initial section into three equal strands. Make one cross of a regular three-strand braid: right over middle, then left over middle. This creates the very beginning of your French braid, which is a good start.
Add Hair to the Right Strand: Before you cross the right strand over the middle again, pick up a small, new section of hair from the right side of your head, near the braid. Add this new hair to your original right strand, making it thicker, you know. Then, cross this combined, thicker right strand over the middle strand, just like before.
Add Hair to the Left Strand: Similarly, before you cross the left strand over the new middle strand, gather a small, new section of hair from the left side. Combine this new hair with your original left strand. Now, cross this combined, thicker left strand over the middle strand, which is the pattern.
Continue Adding and Braiding: Keep repeating steps 3 and 4, adding new sections of hair from each side as you move down your head. Try to pick up equal amounts of hair each time to keep the braid looking even, which is important for a nice finish. Maintain a consistent tension throughout the process, too.
Finish with a Regular Braid: Once you've gathered all the hair from the sides of your head, you'll be left with three strands of hair. Finish the rest of the braid as a regular three-strand braid down to the ends. Secure it with a hair tie, and you're done, basically.
French braiding can take a little more practice, especially getting the added sections smooth, you know. Don't get discouraged if your first few tries aren't perfect; it's a skill that builds over time, like learning any new craft. You'll get the hang of it, seriously, with a bit of patience.
Learning the Dutch Braid
The Dutch braid is often called an "inside-out" French braid, and it's very similar, but with a cool twist. Instead of crossing the strands over the middle, you cross them *under* the middle, which makes the braid stand out from your head. This gives it a more raised, almost sculptural look, which is pretty neat.
Step-by-Step Dutch Braid
Initial Section: Just like with the French braid, start by taking a section of hair from the top of your head. Divide this section into three equal strands, which is your starting point, essentially.
Cross Under the Middle (Right): Take the rightmost strand and cross it *under* the middle strand. The right strand is now in the middle, but beneath the original middle strand, in a way. This is the key difference from the French braid, you know.
Cross Under the Middle (Left): Now, take the leftmost strand and cross it *under* the new middle strand. The left strand is now in the middle, again, beneath the original middle strand. You're creating that raised effect from the start, you see.
Add Hair to the Right Strand and Cross Under: Before you cross the right strand under the middle again, pick up a small, new section of hair from the right side. Add this new hair to your original right strand. Then, cross this combined, thicker right strand *under* the middle strand, just like you did before.
Add Hair to the Left Strand and Cross Under: Similarly, before you cross the left strand under the new middle strand, gather a small, new section of hair from the left side. Combine this new hair with your original left strand. Now, cross this combined, thicker left strand *under* the middle strand, which continues the pattern.
Keep Going: Continue repeating steps 4 and 5, adding new sections of hair from each side and crossing the strands *under* the middle. Try to keep your added sections even and your tension consistent for a smooth braid, which is really important for the look.
Finish the Braid: Once you've gathered all the hair from the sides, finish the rest of the braid as a regular three-strand braid, still crossing the strands *under* each other. Secure the end with a hair tie, and you'll see that cool raised effect, which is very distinct.
The Dutch braid can feel a little trickier at first because of the "under" motion, but with a bit of focus, you'll get it, you know. It creates a bold, noticeable braid that's really popular right now, and it's a great way to show off your braiding skills, too.
Helpful Braiding Advice for Different Hair Types
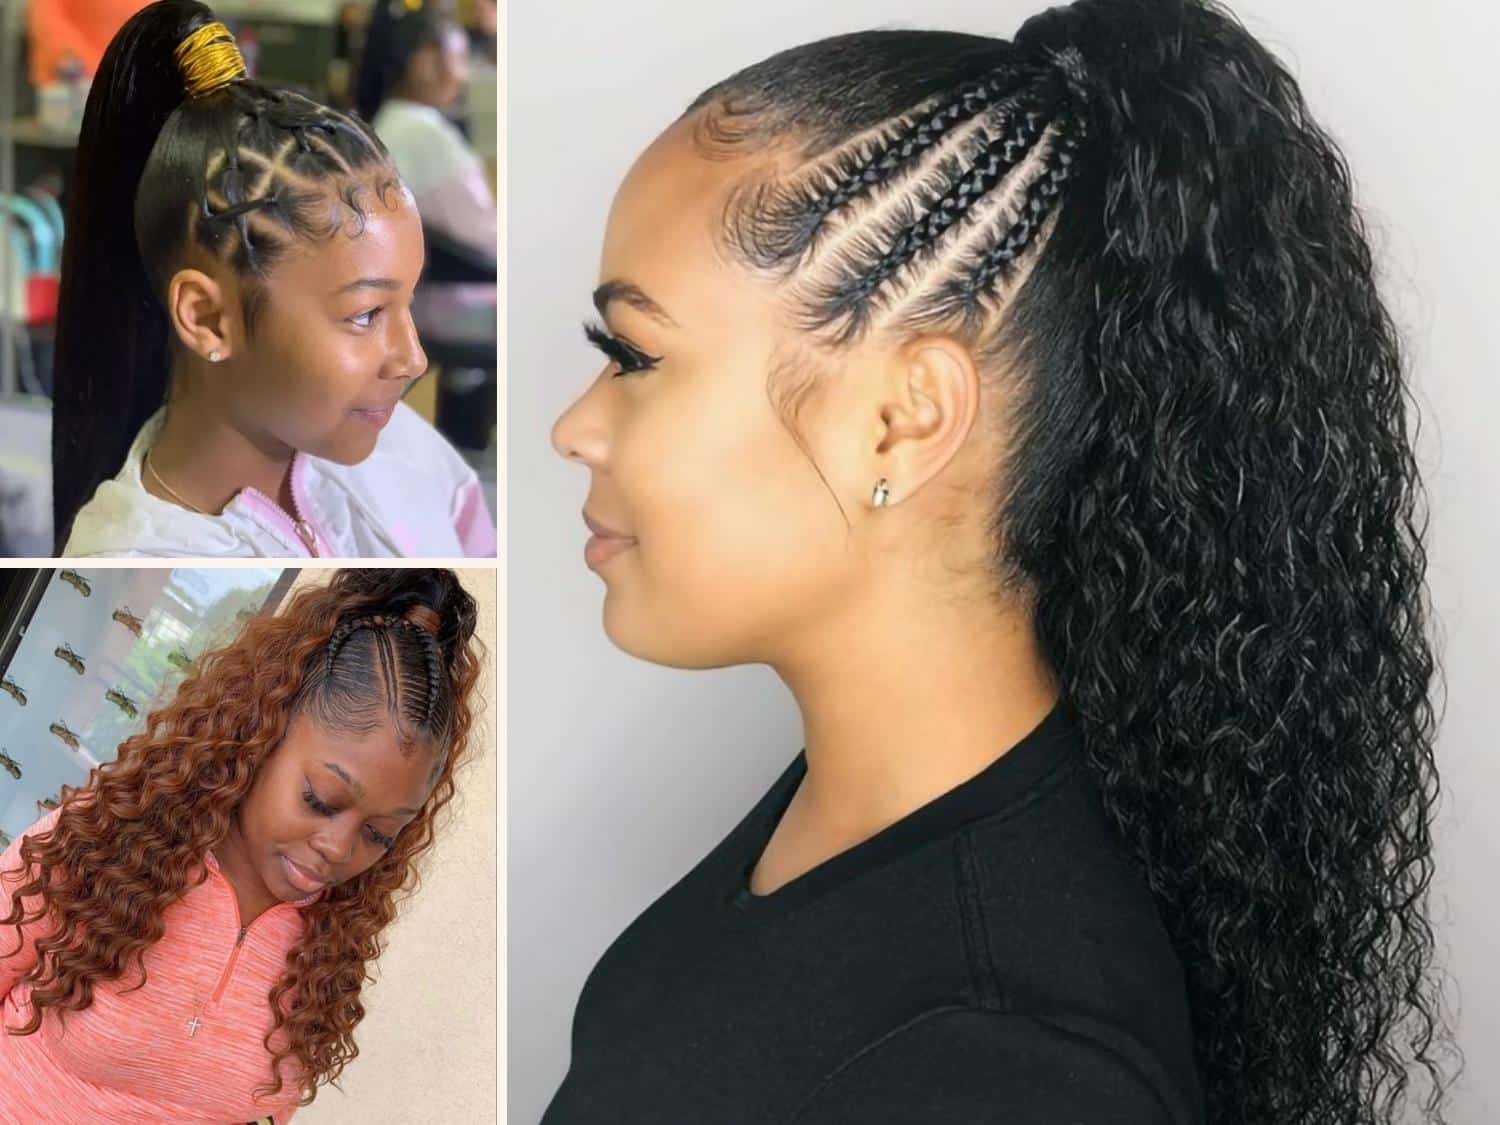
Braiding is a simple weaving technique, but how you approach it can change a bit depending on your hair's unique qualities. My text shares best advice on how to braid hair—along with braid tutorials for short hair, fine hair, curly hair, and more, which is very helpful. Here are some pointers for different hair types, basically.
Braiding Short Hair
Braiding short hair can seem tricky, but it's totally possible, you know. Focus on smaller sections of hair and use smaller, clear elastic bands to secure the ends. You might find that French or Dutch braids work well for shorter lengths, as they keep the hair close to the head, which prevents stray pieces.
For very short hair, try mini braids near the hairline or on the sides, which can add a fun accent. Using a bit of hair gel or mousse can help hold those shorter pieces in place, making the braid look neater, too. It's about working with what you have, and making it look good, apparently.
Working with Fine Hair
Fine hair can sometimes slip out of braids easily, but there are ways to make it work, you know. Before braiding, try adding some texture to your hair with a dry shampoo or a texturizing spray. This gives the hair more grip and volume, making it easier to hold the braid together, which is pretty useful.
Keep your tension firm but not too tight when braiding fine hair. A looser braid might unravel, but too much tension can make it look thin, so it's a balance. You might also want to gently pull apart the sections of the finished braid to make it appear fuller, which is a common trick, obviously. Learn more about hair care tips on our site.
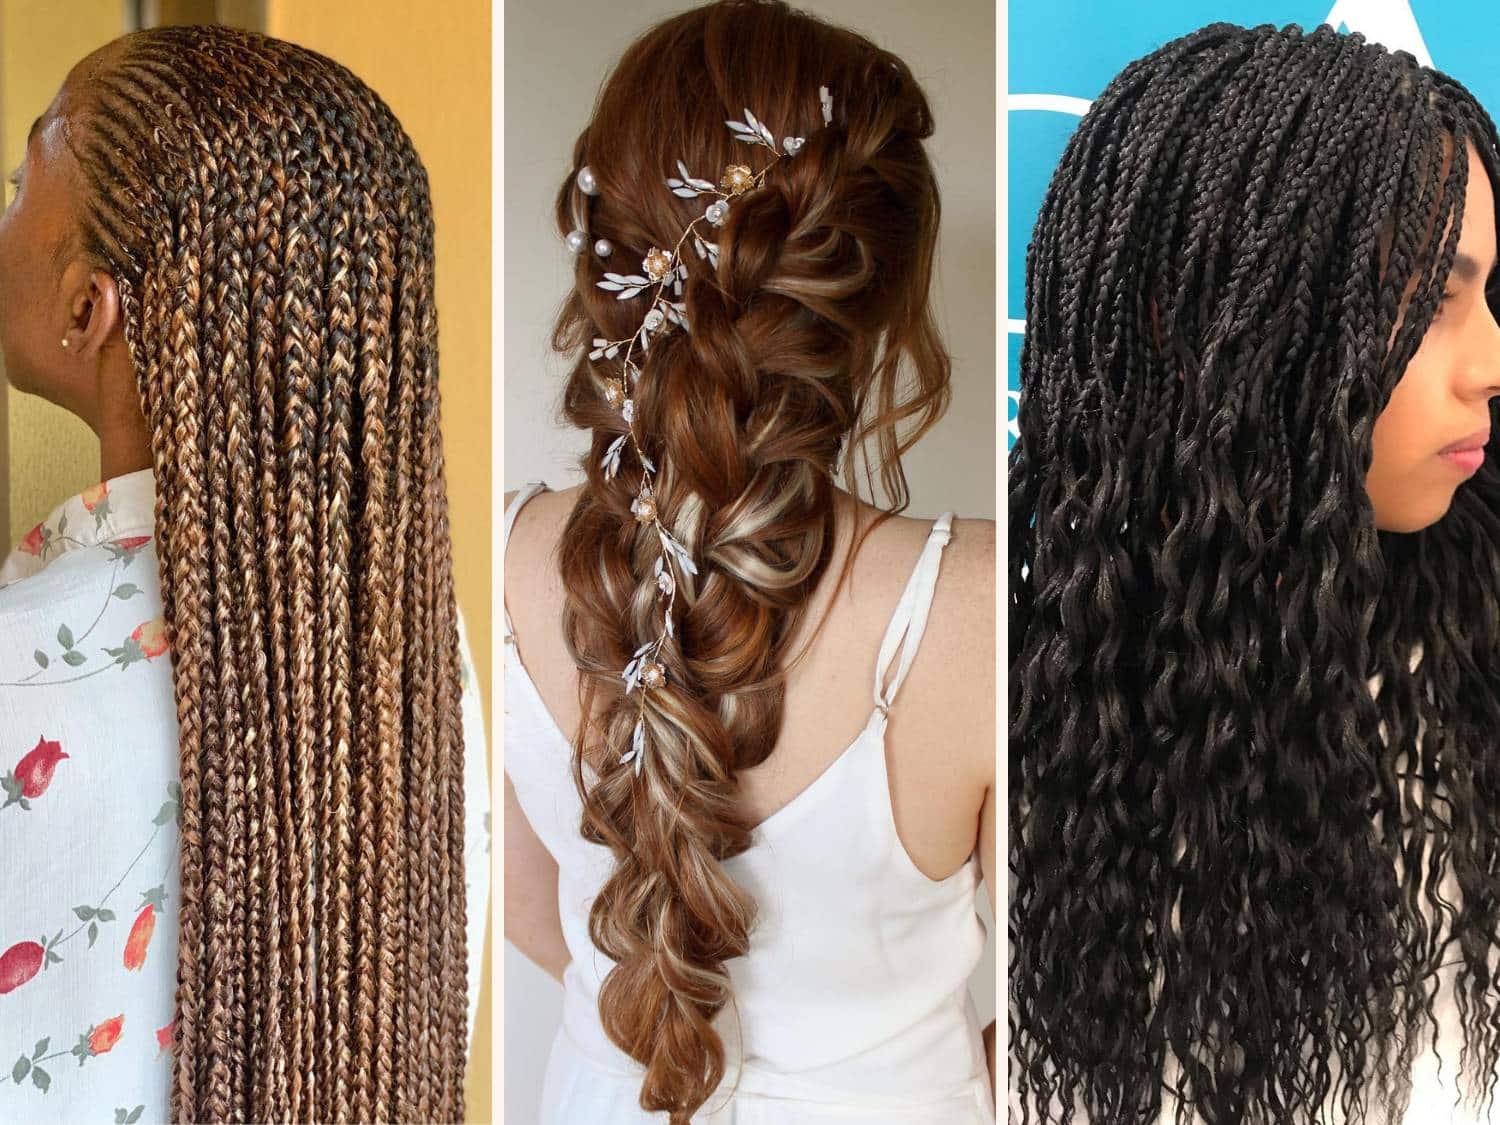
Braiding Curly Hair
Curly hair has natural texture, which is a great advantage for braiding, you know. The curls help the braid hold its shape and can give it a beautiful, voluminous look. However, curly hair can also be prone to tangles, so make sure it's well-combed or brushed before you start, which is very important.
You might want to braid curly hair when it's slightly damp, or after applying a leave-in conditioner, which helps smooth the strands. This can reduce frizz and make the braiding process smoother, too. Don't pull too hard on your curls; work gently to keep their natural bounce, like you're handling something delicate. You can find more helpful advice about styling curly hair on this page.
Frequently Asked Questions About Braiding
Here are some common questions people ask about braiding hair, you know, because it's natural to have questions when learning something new.
Is braiding hard to learn?
Braiding is not hard to learn, but it does take some practice, you know. The basic three-strand braid is quite simple to pick up. French and Dutch braids require a bit more coordination, but with consistent effort, anyone can learn them, which is pretty encouraging.
What's the easiest braid for beginners?
The easiest braid for beginners is definitely the classic three-strand braid, you know. It teaches you the fundamental weaving motion. Once you feel comfortable with that, you can move on to slightly more involved styles, which builds your confidence.
Can you braid short hair?
Yes, you can absolutely braid short hair, too. It might require smaller sections and a bit more patience, but many short hairstyles look great with braids. Consider trying mini braids or half-up styles that incorporate braids, which can add a lot of style.
Braiding is a simple weaving technique used for everything from hair to ribbon to flowers, you know. Braiding your hair can be a huge timesaver while also creating a hairdo you can flaunt! It's a skill that gives you creative freedom with your hair, which is really something special. For more inspiration, you could look at braid styles on Pinterest, which is a good place to see different looks.
Styles - Braid Hairstyles
20 Weave Braid Hairstyles - Braid Hairstyles
Cute French Braid Hairstyles: 20 Easy French Plaits With Pictures
