Learning How To Draw A Flower: A Simple Guide For Everyone
Have you ever looked at a beautiful bloom and wished you could capture its delicate charm on paper? Well, you're in luck! Learning how to draw a flower is a wonderful way to express your creativity, and it's much simpler than you might think. Whether you're just starting out or looking for a fun new hobby, putting a flower on paper can be a very calming and rewarding activity, that is for sure.
This lesson, in a way, is meant for younger artists, and we hope you have a lot of fun following along with us. You can learn how to draw a cute flower for preschoolers, too. These easy flower drawing tutorials are perfect for kids and beginners, offering a gentle introduction to art that anyone can pick up. You might be surprised at how quickly you can make something lovely, you know?
With over 60 different flowers to choose from, you are sure to find the perfect inspiration and tutorial for your artwork. Thankfully, by using some basic shapes and putting in a little bit of practice, you can draw any kind of flower in nature in just a few steps. It's really about seeing the simple forms within the more complex ones, that is actually how it works.
- Drones Over New Jersey Solved
- Blake Lively Drama
- Kylie Jenner Boyfriend
- Shiloh Hendrix Gofundme
- Little House On The Prairie Reboot
Table of Contents
- Why Draw Flowers?
- Getting Started with Your Flower Drawing
- The Magic of Basic Shapes for Flowers
- Drawing a Simple Flower Step-by-Step
- Exploring Different Flowers for Your Art
- Adding Depth and Beauty to Your Flower Drawings
- Digital Tools for Drawing Flowers
- Frequently Asked Questions About Drawing Flowers
- Your Journey to Drawing Beautiful Flowers
Why Draw Flowers?
Drawing flowers is a truly lovely way to connect with nature and your own creative spirit. It's a peaceful activity that can help you relax and focus. Plus, you get to create something beautiful that you can share with others or just admire yourself. It's very satisfying, you know?
For kids and beginners, drawing flowers builds confidence and helps develop fine motor skills. It teaches you to observe the world around you more closely, noticing shapes, colors, and textures. This can be a really fun way to spend an afternoon, too it's almost a given.
And, honestly, there's a huge variety of flowers out there. This means you'll never run out of new things to draw. You can always find a fresh challenge or a new inspiration, which is quite nice, apparently.
Getting Started with Your Flower Drawing
Before you begin, gathering a few simple supplies and getting into the right frame of mind can make all the difference. You don't need anything fancy to start. Just some basic items will do the trick, in a way.
What You Need
To start drawing flowers, you really just need a few basic things. Here's a quick list:
- Pencil (a regular HB pencil is great for sketching)
- Eraser (for making corrections)
- Paper (any kind of paper will work, from printer paper to a sketchbook)
- Optional: Colored pencils, crayons, or markers if you want to add color
That's pretty much it! You probably have most of these items around your home already, which is quite convenient, don't you think?
A Good Mindset
The most important tool you have when learning how to draw a flower is your mindset. Try to approach it with a sense of fun and curiosity. Don't worry about making something perfect right away. The goal is to enjoy the process and learn as you go. Every line you draw is a step forward, you see.
Remember, practice makes progress. Even a little bit of drawing each day can help you improve a lot over time. Just relax, put on some nice music, and let your hand move. It's about having a good time, really.
The Magic of Basic Shapes for Flowers
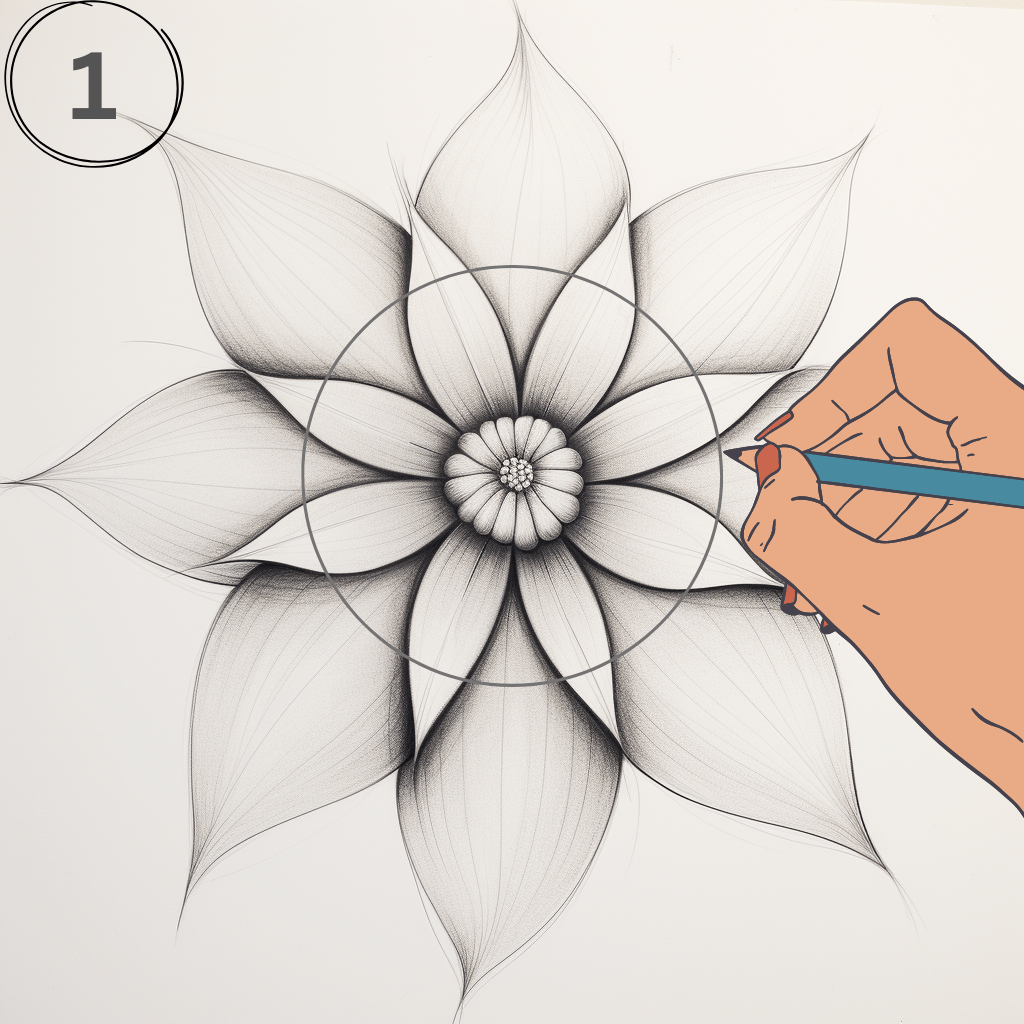
The secret to drawing any kind of flower, or really anything at all, is to break it down into simple shapes. Think of circles, ovals, triangles, and even straight lines. These are your building blocks. For instance, a flower's center might be a circle, and its petals could be ovals or teardrop shapes. This method simplifies what might seem complex, you know?
This technique is perfect for beginners and helps you understand the structure of the flower before adding tiny details. By starting with basic forms, you can get the proportions right and make sure your flower looks balanced. It's a very helpful trick, actually.
So, when you look at a flower, try to see the simple shapes hidden within its petals and leaves. This way of seeing things will make drawing much easier and more fun. It's almost like solving a little puzzle, in some respects.
Drawing a Simple Flower Step-by-Step
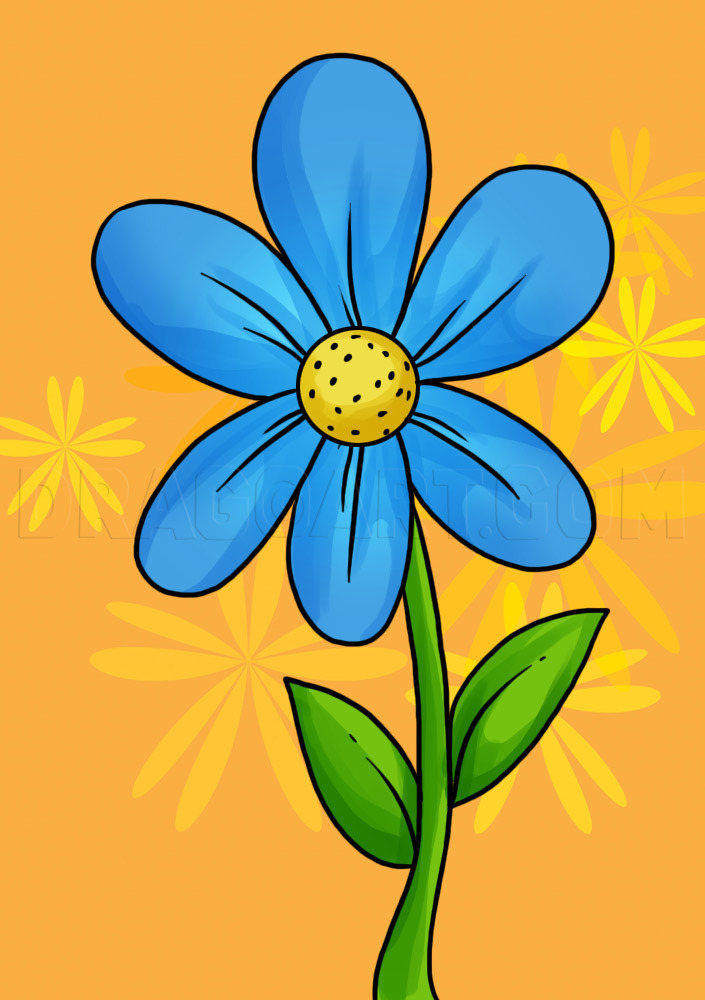
Let's draw a basic flower with a stem and a pair of leaves using a simple style. This tutorial is easy to follow and will help you get started right away. It's a great first step, really.
Step 1: The Center
Begin by drawing a simple circle in the middle of your paper. This will be the center of your flower. Don't press too hard with your pencil, as you might want to adjust it later. This circle doesn't have to be perfect, just a general guide, you know?
This initial circle sets the stage for the rest of your flower. It's where all the petals will connect, so make sure it's placed where you want your flower to be on the page. It's the starting point, basically.
Step 2: The Petals
Now, draw petals around the circle. You can make them simple oval shapes, or slightly curved shapes that look like teardrops. Overlap them a little bit if you like, to give your flower a fuller look. Try to make them somewhat even in size, but don't worry if they're not exactly the same. Nature isn't perfect, after all, is that right?
You can add as many petals as you like, making them big and round or slender and pointed. This is where you can start to give your flower its own unique personality. Just have fun with it, you know?
Step 3: The Stem and Leaves
From the bottom of your flower's center, draw two parallel lines going downwards to create the stem. Make it as long or as short as you want your flower to be. Then, draw a pair of leaves coming off the stem. These can be simple oval shapes with a pointed end, or you could make them a bit more detailed with a slight curve. It's pretty straightforward, you'll see.
The stem gives your flower support, and the leaves add to its natural appearance. You can place the leaves at different heights on the stem, or even have them facing different directions. This adds a bit of life to your drawing, apparently.
Step 4: Adding Details and Finishing Touches
Once you have the basic shape, you can add some small details. For example, draw a smaller circle inside the main center circle, or add tiny dots for texture. You can also draw a line down the middle of each leaf to show the main vein. Go over your pencil lines to make them a bit darker where you want them to stand out, and then erase any light sketch lines you don't need anymore. This step really brings your flower to life, actually.
You might also add some subtle lines within the petals to suggest their natural folds and curves. This makes your flower look more realistic and gives it a bit more character. Just a little bit of effort here goes a long way, you know?
Exploring Different Flowers for Your Art
Once you're comfortable with a simple flower, you can start to explore different types! The principles of basic shapes and step-by-step drawing apply to almost any flower you can imagine. There are so many beautiful options out there, so.
How to Draw a Rose
Drawing a rose can seem tricky because of its many petals, but it's really about drawing overlapping curves. Start with a small spiral or a few curved lines for the very center. Then, draw curved, heart-like shapes around that center, making each layer slightly larger and more open than the last. These illustrated tutorials are easy to follow and will help you draw beautiful roses. It's a bit like building a layered cake, you might say.
You can make your rose as full or as open as you like by adding more or fewer layers of petals. Remember to keep your lines light at first, so you can adjust them as you go. This makes the process much less stressful, obviously.
How to Draw a Lily
Lilies often have large, distinct petals. For a lily, you might start with a long, slightly curved stem. Then, draw three main petals that open outwards, forming a kind of cup shape. After that, add three more petals behind or between the first set. Lilies tend to have prominent stamens in their center, which you can add with small lines and dots. They are quite elegant, too.
The key to a lily is often its graceful curves and the way its petals spread out. Pay attention to the gentle bends in the petals to make them look more natural. It's a rather lovely flower to draw, honestly.
How to Draw a Tulip
Tulips are known for their simple, cup-like shape. To draw a tulip, start with an oval for the main part of the flower. Then, draw two petals that form the front of the cup, meeting at the top. Add a third petal behind these two, peeking out from the middle. Tulips have strong, straight stems and long, broad leaves that often wrap around the stem. They are pretty straightforward, actually.
The beauty of a tulip comes from its clean lines and simple form. You don't need a lot of complex details to make it recognizable and charming. It's a great flower for practicing symmetry, in a way.
How to Draw a Dandelion
A dandelion is a bit different, with its many tiny petals. You can start with a small circle for the center. Then, draw many short, straight lines radiating outwards from the circle, like spokes on a wheel. These lines represent the thin petals. You can add a few layers of these lines to make it look full. Dandelions have a hollow stem and jagged leaves. They are surprisingly fun to draw, you know?
Drawing a dandelion captures its cheerful, fluffy look. It's a good exercise in drawing many small, repeated elements to create a larger form. This type of flower is very forgiving, so don't worry about perfect lines.
Adding Depth and Beauty to Your Flower Drawings
Once you've got the basic shapes down, you can start to make your flowers look even more beautiful and realistic. This involves adding shading and focusing on those smaller details. It's where your artwork really starts to shine, you know?
Shading Your Flower
Shading gives your flower a three-dimensional look. Think about where the light source is coming from. Areas facing the light will be brighter, and areas away from it will be darker. Use lighter pencil pressure for brighter areas and more pressure for darker spots. You can also use a finger or a blending stump to smooth out your shading. This adds so much to your drawing, it's incredible.
Shading helps to show the curves and folds of the petals, making them appear to pop off the page. Even simple shading can make a big difference in how real your flower looks. It's a skill that gets better with practice, like your drawing ability itself, apparently.
Capturing Details
Look closely at real flowers or pictures of them. Notice the tiny veins on the leaves, the texture in the center, or the slight imperfections on the petals. Adding these small details can make your drawing much more interesting and lifelike. Don't feel you have to add every single detail, just pick a few that stand out to you. This is where your personal touch comes in, really.
The goal is to capture the beauty with shapes, shading, and detail. These elements work together to create a complete and engaging piece of art. For beginners and aspiring artists, paying attention to these small things can greatly improve your work. It's a very rewarding part of the process, too.
Digital Tools for Drawing Flowers
If you prefer drawing on a screen, there are fantastic free online drawing applications available for all ages. These tools let you create digital artwork that you can share online and export to popular image formats like JPEG, PNG, SVG, and PDF. It's a very modern way to make art, you know?
One such tool, for instance, has just updated to version 4.1, and it offers some really neat features. You can draw the letter “s” to take a shortcut to the style chooser. While holding a button, you can tap the screen with different finger combinations to access tool presets that have been set up. This makes drawing very quick and efficient, apparently.
You can easily draw, edit photos, or even design your next business card with these applications. They are great for crafting images for social media posts, digital ads, paper, or even apparel. You can even make a quick photo edit with a drag and drop feature. It's quite versatile, really. These applications are also available in many languages, like Polish, Swedish, French, and Spanish, making them accessible to a lot of people.
Frequently Asked Questions About Drawing Flowers
How do you draw a flower step by step?
To draw a flower step by step, you typically start with a simple shape like a circle for the center. Then, you add petals around that center, often using curved or oval shapes. Next, you draw the stem and leaves, usually with straight or slightly curved lines. Finally, you can add small details and shading to make your flower look more complete and lively. It's a pretty straightforward process, actually.
What are the easiest flowers to draw?
Some of the easiest flowers to draw include simple daisies, tulips, and even basic five-petal flowers. These flowers have clear, distinct shapes that are easy to break down into circles, ovals, and straight lines. Dandelions are also quite simple to draw once you get the hang of drawing many small, radiating lines. They are perfect for beginners, you know?
What are the basic shapes to draw a flower?
The basic shapes used to draw a flower are mostly circles and ovals for the center and petals. You'll also use straight or slightly curved lines for the stem. Leaves can often be drawn using elongated oval or teardrop shapes. By combining these simple forms, you can create the foundation for almost any flower. It's quite amazing how simple it can be, really.
Your Journey to Drawing Beautiful Flowers
Learning how to draw a flower is a truly rewarding experience. It's a skill that grows with practice, and every flower you draw will teach you something new. Remember, these easy flower drawing tutorials are perfect for kids and beginners. With over 60 different flowers to choose from, you are sure to find the perfect inspiration and tutorial for your artwork. Keep practicing, keep observing, and most importantly, keep having fun with your art. You might be surprised at what you can create. Learn more about drawing techniques on our site, and find more art tutorials here. For additional inspiration, you could look at some historical flower drawings to see how different artists have captured their beauty over time. It's a wonderful journey, that's for sure.
- Seven Sirius Benjamin
- Bradley Cooper Gigi Hadid
- Rudy Pankow Girlfriend
- Kerry Washington Husband
- Steph Curry Kids

How To Draw Diagram Of Flower How To Draw A Flower
How to Draw a Flower: A Beginner's Guide - Full Bloom Club
How To Draw A Flower Step By Step With Pictures
